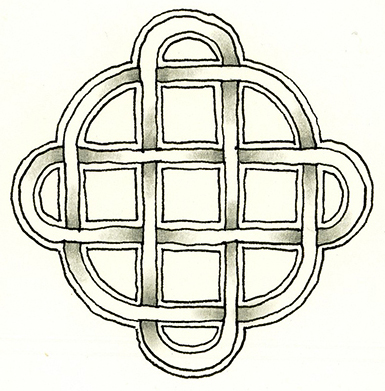
There has been a lot of interest recently in drawing Celtic Knots and there are lots of techniques for drawing them. In my opinion, most do not really follow the Zentangle® drawing method, they involve too many steps or are just too complicated.
Here is a simple three step method I’ve come up with that originated with the tangle Man-O-Man. If you are unfamiliar with this tangle here is the card from my Tangle Deck that shows the step-outs:

As you can see this tangle starts with a square and then squares are drawn next to each of it’s sides to form a cross. Note there is an equal space left between the squares. Triangles are added to fill in the angles formed by the cross, again leaving equal space between the shapes. You can continue adding shapes out as far as you want, building on the previous ones and leaving equal space between them.
Let’s take this one step further. Start by drawing steps one and two in the man-o-man step-outs.

Then draw an aura around the perimeter of these shapes that is offset from them the same distance as the space between them. What happens when you do this is that you can begin to see the squares and triangles as spaces and the space between them as a kind of lattice above them.

I call this Lace Lattice because it reminds me of the holes and strings that make up a piece of lace. Here I’ve added some Beadline behind the Lace Lattice to make it more visible.

With the right configuration of hole shapes, aura and one final step, you can easily and quickly turn the resulting Lace Lattice into a Celtic Knot. Let’s start out the same way we would with the Man-O-Man tangle, with five squares in the form of a cross.
 Then add rounded triangle and semi circle shapes as shown.

Turn this into a Lace Lattice by drawing an aura around the outer edges.

To turn this into a Celtic Knot, draw lines to connect the Lattice, alternating between
horizontal and vertical to create the over and under of the knot.

Ta Da! a Celtic Knot

I’ve spruced it up a little with additional auras and shading.

Here are a few other simple configurations.


And something more free-form starting with a loopy string.


Final drawing with perf line, aura, rounding and shading.

The possibilities seem endless with this technique and you can go as simple or complex as you want. The trick is to keep your spacing between the shapes as even as possible so that they will align when you connect them, but even then it doesn’t have to be perfect. I should note here that just drawing a bunch of shapes next to each other won’t work every time to form a knot. Play around with the technique and you will soon see what will work and what won’t. Finally, here is the drawing I did for the ShamWayRockBop challenge from Rick and Maria using this technique for the border.

I hope you give this method a try and I look forward to seeing all the Celtic knot variations you come up with.
Blessings,
Lynn
