Man-O-Man to Celtic Knots

There has been a lot of interest recently in drawing Celtic Knots and there are lots of techniques for drawing them. In my opinion, most do not really follow the Zentangle® drawing method, they involve too many steps or are just too complicated.

Here is a simple three step method I’ve come up with that originated with the tangle Man-O-Man. If you are unfamiliar with this tangle here is the card from my Tangle Deck that shows the step-outs:

As you can see this tangle starts with a square and then squares are drawn next to each of it’s sides to form a cross. Note there is an equal space left between the squares. Triangles are added to fill in the angles formed by the cross, again leaving equal space between the shapes. You can continue adding shapes out as far as you want, building on the previous ones and leaving equal space between them.

Let’s take this one step further. Start by drawing steps one and two in the man-o-man step-outs.

Then draw an aura around the perimeter of these shapes that is offset from them the same distance as the space between them. What happens when you do this is that you can begin to see the squares and triangles as spaces and the space between them as a kind of lattice above them.

I call this Lace Lattice because it reminds me of the holes and strings that make up a piece of lace. Here I’ve added some Beadline behind the Lace Lattice to make it more visible.

With the right configuration of hole shapes, aura and one final step, you can easily and quickly turn the resulting Lace Lattice into a Celtic Knot. Let’s start out the same way we would with the Man-O-Man tangle, with five squares in the form of a cross.

Then add rounded triangle and semi circle shapes as shown.

Turn this into a Lace Lattice by drawing an aura around the outer edges.

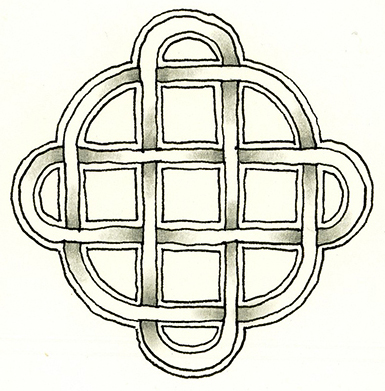
To turn this into a Celtic Knot, draw lines to connect the Lattice, alternating between
horizontal and vertical to create the over and under of the knot.

Ta Da! a Celtic Knot

I’ve spruced it up a little with additional auras and shading.

Here are a few other simple configurations.

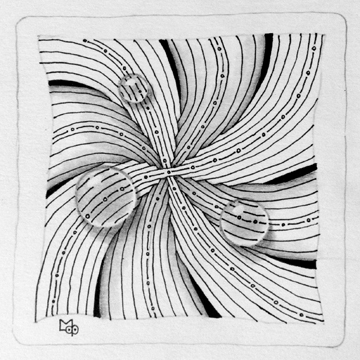
And something more free-form starting with a loopy string.

Final drawing with perf line, aura, rounding and shading.

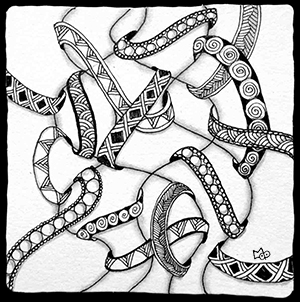
The possibilities seem endless with this technique and you can go as simple or complex as you want. The trick is to keep your spacing between the shapes as even as possible so that they will align when you connect them, but even then it doesn’t have to be perfect. I should note here that just drawing a bunch of shapes next to each other won’t work every time to form a knot. Play around with the technique and you will soon see what will work and what won’t. Finally, here is the drawing I did for the ShamWayRockBop challenge from Rick and Maria using this technique for the border.

I hope you give this method a try and I look forward to seeing all the Celtic knot variations you come up with.

Blessings,

Lynn

Zentwining

The drawing on the Tangle Deck card for Onomato is an example of Zentwining.
This drawing of the Tangle Deck card for Onomato is an example of Zentwining.

I discovered the technique of Zentwining as I was working on the drawings for the fronts of the Tangle Deck cards. I needed a drawing for the tangle Onomato.  I picked up a piece of paper that I had drawn some random overlapping curved pencil lines on and began to draw ribbons wrapping around the lines. I then filled each ribbon with a variation of Onomato. I really liked the result and thought “this could be a technique that could be repeated easily.” I decided to share it and call the technique Zentwining.

1. The first step is to draw some overlapping curving pencil lines as in the following examples.

zentwined strings

2. Next start drawing in ribbons that wrap around these lines. The ribbons are drawn in a similar way to the technique used in the tangle Aquafleur. I’ve used both re-curve and c-curve versions as shown below.

recurve c-ribbon

Here is an example.

add ribbon

3. Ribbons can go in any direction, extend off the page, and even cross lines. Using the Hollibaugh method of drawing behind makes it even more interesting.

All ribbons

4. Once you are satisfied with the quantity and placing of your ribbons, the next step is to draw over the pencil lines with pen making sure you stop at the edge of each ribbon and then start up again on the other side. Here is an enlargement so you can see what I mean.

detail

Here is the drawing with all the lines drawn in pen except where the ribbons cross.

lines

5. Now start adding tangles to the ribbons. You can use variations of one tangle as I did for the Onomato card or use different tangles.

add tangles

As you can see, any remaining pencil lines are beginning to disappear into the tangles.

all tangles

6. The final step is to add shading. I add shading to the tangles themselves first, then I add just a touch of shading to each side of the string lines to add a little 3D effect (makes the shapes formed by the strings kind of puffy.) Lastly I add shading to the ribbon shapes if I think it needs it.

Here are a couple of finished examples.

Done

I will admit that this technique can take some concentration as it can get kind of busy as you work on it. Just take it slowly and be aware of your strokes and you’ll do fine. Hope you have fun playing with this technique and I look forward to seeing what you come up with.

Lynn Mead, CZT

Dew Drop Tutorial


I recently posted this tile with the Dew Drop tangle enhancer (AKA tanglenhancer) on one of the many Facebook pages featuring Zentangle tiles and artwork. There was such a positive reaction to these dew drops that I’ve decided to post a tutorial on how to do them.

First of all let me explain what a tanglenhancer is. It is a technique which can be added or combined with a tangle to change or enhance it’s appearance. In the case of Dew Drops it gives the appearance of water drops on the surface of the tangle.

Here are the steps to reproduce Dew Drops.

Dew Drop 01a

Using pencil, define where the dew drops will be when drawing your string.

Dew Drop 02a

Using pen, draw your tangles as usual except stop and start the lines at the edges of the dew drops.

Shade all sections except the dew drops.

TIP: Tangles that are mainly constructed of lines are easier to create as Dew Drops. Remember this when choosing tangles for this purpose.

Dew Drop 03a

Using your pencil, shade the dew drops as described below:

  1. Dew Drop shading diagramLeave an area white for the highlight.
  2. Add a dark thin line to define the upper edge. Note: DO NOT outline the dew drop in pen.
  3. Lightly shade the middle of the dewdrop going almost to the the edge.
  4. Leave a lighter area along the edge opposite the highlight.
  5. Add a shadow to the outside of the dew drop opposite the highlight.

Variation: If you stop at this point the shapes will appear like pearls sitting on top of the tile.

Dew Drop 04a

The final step is to add the lines indicating the tangles underneath. Make sure NOT to draw over the white upper highlight.

TIP: You do not have to duplicate the exact number of lines from the tangle underneath. Start with the line(s) that would cross the middle of the dew drop. As you add lines just increase the space between them to be slightly more than the pattern underneath giving the illusion of magnification. Stop the lines just short of the dew drops edge.

With a little practice you too can enhance your tangles with Dew Drops.