Did you miss me? I know my tangler’s mind hasn’t shared much so far this year, but all I can say is life happens, and once you get out of the habit of posting, it’s hard to start up again. Anyway, here I am, and I’m excited to have something brilliant to share with you.
Around the middle of June this year, Pilar Pulido, a CZT from Madrid, Spain, contacted me. She was developing a class that was to be presented at the European CZT Gathering in September and wanted to know if I’d like to collaborate with her. The class she proposed appealed to my tangler’s mind, so of course, I said yes, and our trans-Atlantic collaboration began (me in Monroe, WA, U.S.A, and Pilar in Madrid, Spain). Pilar had an idea to use math to describe tangle strings, and we decided to focus on Fibonacci numbers and the Golden Ratio.
It was great fun to collaborate with another CZT nine time zones away. At first, we just emailed. Then we switched to Messenger and DropBox. Finally, towards the end, we made calls over the internet. We just had to remember to schedule meetings when the time was convenient for both of us. In the end, we were both really happy with the class and Pilar presented it last month at the European CZT Gathering in Cork, Ireland where it was well received.
Here are some highlights:

 Pilar teaching the class in Cork
 class mosaic and samples
After the great response to this class we decided to share the class content with the rest of the Zentangle community, so here is a summary of the class and a link at the end to the class handout. Enjoy!
Math Strings: Fibonacci Numbers, the Golden Ratio, and the Golden Spiral
What is it about some objects that make them aesthetically pleasing? It is thought one answer to this question is the Golden Ratio, also known as Phi and represented by the Greek letter Φ. The Golden Ratio is a mathematical relationship that exists in art, shapes, nature, and patterns. This ratio is 1 to 1.618 (rounded).
One cannot talk about the Golden Ratio without also mentioning the Fibonacci sequence. What is the Fibonacci sequence? It is a sequence of numbers where each number in the sequence is the sum of the previous two.
1+1=2, 2+1=3, 3+2=5, 5+3=8, 8+5=13… OR 2, 3, 5, 8, 13, 21, 34, 55, 89, 144…
The relationship of each number to the next number in the sequence is a very close approximation of the Golden Ratio.
The Fibonacci sequence and the Golden Ratio are evident all around you from the microscopic to the macroscopic (see the link at the end of this blog for examples). Here is one example you can try yourself. Hold out your first finger. Note that the length of the first and second bones added together equals the length of the third. 1+2=3 seem familiar?

This length relationship (ratio) allows your fingers to fold into a compact spiral to form a fist.

The Golden Ratio is also used in defining a Golden Rectangle and a Golden Spiral.

The length of each side of a Golden Rectangle is determined according to the Golden Ratio. The ratio of the shorter side to the longer side is 1 to 1.618. If you define the largest square possible inside a golden rectangle, what is left over is a smaller golden rectangle. This process can be repeated with each golden rectangle, and each square maintains the golden ratio to the previous square. Adding a quarter arc to each square results in a Golden Spiral.
The Golden Ratio, along with other maths, seems to be important in defining the framework of our universe or, to put it in Zentangle terms, “the strings” that determine how some things look and act. We are not always aware of their existence because, like the strings on a Zentangle tile, they disappear beneath the surface, but they are there, and they beautifully demonstrate the Zentangle concept of the “elegance of limits.”
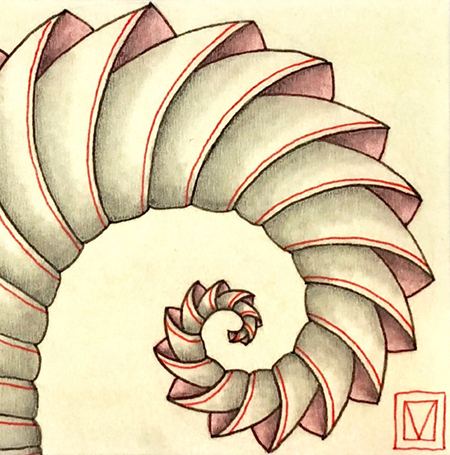
It is the Golden Spiral we have chosen as our “math string” for the class project.
Note the class handout goes into a little more detailed explanation of the Golden Ratio, Golden Rectangle, Golden Spiral, and Fibonacci numbers, and I’ve provided some links to some fun and interesting information that can be found on the web. You will not be required to do any math to create this project, there is no test!
A word about the paper used in the class.
Part of what makes this class work is the paper. The paper is Fabriano Pergamon, weight: 230g/m², color: ivory. It is a semi-translucent parchment with a textured surface that provides just the right combination of opacity and translucence for this project. And yes, this paper is made by the same company that manufactures the Fabriano Tiepolo paper used for official Zentangle® tiles.
UPDATE Aug. 14, 2022: BREAKING NEWS! If you live in Europe, Pilar is selling these special Pergamon tiles on her site, Zentrarte, in both colors, natural and white. Here’s the link to her store:
https://zentrarte.es/producto/inspiring-tiles-square-pergamon/
NOTE: Here’s the good news, it’s available in Europe and Canada (happy face.) Here’s the bad news, we have been unable to find a source in the United States (sad face.) I’m not sure of its availability in other countries; I think it is also available in Australia. I am still searching for a source or an alternative in the U.S. If you happen to find a source, please let me know (Please Note I’ve already contacted the company Fabriano lists on their site).
PAPER UPDATE: I have located an excellent substitute for the Fabriano Pergamon Parchment. Here are the details:
Fedrigoni Pergamenata Parchment (manufactured in Italy)
Weight: 230gsm (85 lb. cover)
Color: Ivory (or natural) also comes in white
U.S. Links for ordering 27” x 39” sheets:
Dolphin Papers
John Neal Bookseller
U.S. Link for ordering 8.5” x 11” sheets:
Amazon
UPDATE Aug.14, 2022: Apparently, this paper is not currently available through Amazon US. Try the following link instead.
Natural color
https://www.cardstock-warehouse.com/products/natural-pergamenata-parchment-cardstock-paper?pr_prod_strat=description&pr_rec_id=a4da600ef&pr_rec_pid=8533439809&pr_ref_pid=8533435649&pr_seq=uniform&variant=31958516531245
White color
https://www.cardstock-warehouse.com/products/white-bianco-pergamenata-parchment-cardstock-paper?variant=31958516727853
UPDATE Aug.14, 2022: Thanks to all those who have provided additional links for Pergamon or Pergamonata paper in other locations: I will update this list when I get additional information.
AUSTRALIA:
https://www.amazon.com.au/Parchment-Paper-PERGAMENATA-Cardstock-Warehouse/dp/B01N43Z0ZQ
CANADA
https://www.deserres.ca/products/fabriano-pergamon-parchment-paper?variant=39362001338501
GERMANY
https://www.gerstaecker.ch/FABRIANO-Pergamentpapier.html?gclid=Cj0KCQjwuuKXBhCRARIsAC-gM0jl92EKZTyVhuAO_DUvfJ0IhbMAWsO8rsaP4QMoy6ffpgIhCuhFggIaAu36EALw_wcB
SLOVENIA
https://fabriano.com/en/product/pergamon/
UK
https://www.greatart.co.uk/fabriano-pergamon-paper.html
US
https://www.talasonline.com/Pergamenata-Parchment-Paper
I should also mention that I heard Fabriano is discontinuing the Pergamon but have not been able to verify. However, I believe the Pergamenata is also available in Europe and Canada.
UPDATE Aug.14, 2022: Verified that the Fabriano Pergamon is still available.
The class handout provides templates of the golden spiral going in both directions, and because of the translucence of the Pergamon paper, you can lay it over the template and use it like a pre-strung tile.
 Pergamon paper taped over the template.
Phicops – the main tangle


We chose to use the tangle Phicops for our Golden Spiral project because it works so well on the spiral and has a connection to the Golden Ratio. It is by Laura (The Diva) Harm’s husband, B-rad. The story of Phicops, its step out, and its connection to the golden ratio can be found on Laura’s blog here.
Directions for drawing Phicops using the Golden Spiral Template can be found in the Class Handout.
Of course, you can use other tangles with the Golden Spiral too. Here are some examples of other tangled spirals using Molygon, Echoism, and Paradox.
 Using Molygon and Echoism in a double spiral.
 Using Paradox on a single spiral.
But wait, there’s more! Now for the surprise…
One of the reasons the Fabriano Pergamon paper was chosen for this project is its combination of opacity and translucence. In addition to the ability to see the template and use that as a string, one is also able to add color and pattern on the back. It will be barely noticeable from the front in normal light but magic happens when you view the drawing lighted from the back.
Here’s an example of what I mean.

Phicops embellished with Onamato and color.
Note the subtle Sandswirl in the background done in white gel pen.

Color was added to the back side of the drawing.
Note: it is barely noticeable in normal light when
viewed from the front (see above)

When backlit, the added color on the back is visible, and
the gel pen, since it is opaque ink, appears as a grey line.
Here are two more examples from the class in Cork. Thanks to Marguerite Samama and Joanna Quincey for giving permission to show their work here.

 Joanna Quincey’s drawing in normal light (on top)
The color detail and added tangles are revealed when backlit (on the bottom)

 Margurite Samama’s drawing in normal light (on top)
The tangle details are revealed when backlit (on the bottom)
Note also her variation of Phicops.
We hope you’ll download the Class Handout and give our project a try (even though you may have to find a substitute for the paper.) We have decided to offer the handout for free, but if you’d like to help us defray the costs of developing the class and providing the download, you can send us a donation through PayPal to lynn@atanglersmind.com (here’s a link that explains how to do that.)
Click on the link below to download the class handout PDF. You will need to know how to save a PDF from your browser and operating system. (Note: this pdf has been formatted to print on both Letter and A4 size paper)
MathStrings-The Golden Ratio
Finally, as promised, here are some links to interesting websites and fun YouTube videos about Fibonacci numbers and the Golden Ratio.
https://www.mathsisfun.com/numbers/nature-golden-ratio-fibonacci.html
This site has a fun interactive demonstration of how the Fibonacci sequence and the golden ratio help plants to pack the maximum number of seeds into their seed heads.
https://io9.gizmodo.com/5985588/15-uncanny-examples-of-the-golden-ratio-in-nature
This site has examples of the Fibonacci sequence and the golden ratio in nature.
https://www.youtube.com/watch?v=ahXIMUkSXX0
https://www.youtube.com/watch?v=lOIP_Z_-0Hs
Fun YouTube videos about the Fibonacci numbers and plants.
Give this project a try, and we guarantee you will create a drawing of divine proportions!
Blessings,
Lynn and Pilar


 Pilar teaching the class in Cork
 class mosaic and samples


 Pergamon paper taped over the template.

 Using Molygon and Echoism in a double spiral.
 Using Paradox on a single spiral.


 Joanna Quincey’s drawing in normal light (on top)
 Margurite Samama’s drawing in normal light (on top)