Introducing Tangle Deck

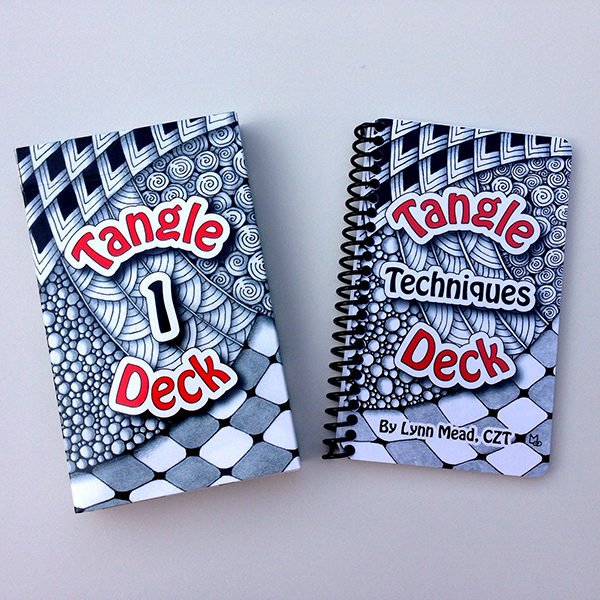
Tangle Deck now available in the U.S.

International Sales available in the near future

OK, I admit it took a little longer than planned, but I’m happy to announce that Tangle Deck is now on sale through my web site, www.atanglersmind.com.

A Little History

Tangle Deck had its start over two years ago before I even became a CZT. Since then it has gone through several revisions based on feedback from Tanglers, CZTs and even Rick at Zentangle headquarters. The cards started out as 2.5” x 3.5” poker size cards but the step-outs seemed too small. I ended up increasing the size of the cards to 3.5” x 5.75” so they would be easier to use by everyone.  I also felt the tangles should be categorized in some way and went through several schemes for doing so. I finally decided the best way to categorize tangles was by showing the elemental strokes of the Zentangle Method used to draw them. I also changed the tangles that were included to ensure they were all “officially released” by Zentangle HQ. I had originally not intended to include a book, but as I progressed in my Zentangle practice it became increasingly clear to me that one was needed, so I created Tangle Deck Techniques. I also wanted to provide examples of the techniques and demonstrate that it’s not how many tangles you know but what you can do with them that matters. That is how the drawings for the card backs came about. The end result of all this research and development is the current Tangle Deck now available on my site.

The official marketing blurb…

TD1-B

Tangle Deck was created by Certified Zentangle® Teacher, Lynn Mead, to provide a durable and portable reference to copyright-free tangles introduced by Zentangle Inc. These tangles are designed to be easy to learn and use with the Zentangle Method of drawing. Tangle Deck is a resource that includes step by step instructions, provides ideas and inspiration, and is as portable as the rest of your Zentangle supplies. Its purpose is to inspire you, stimulate creativity, and nurture you on your Zentangle journey.

TD1-Cards

  • 52 copyright-free and easy to learn Tangles introduced by Zentangle Inc.
  • Large 3.5″ x 5.75″ cards are designed to be used by all ages.
  • Coated cards are durable and let you easily sort through the deck.
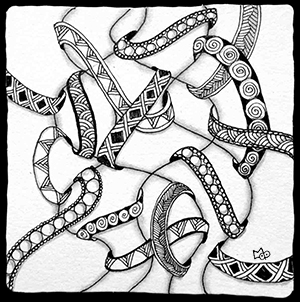
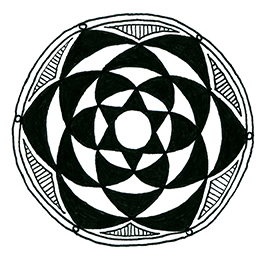
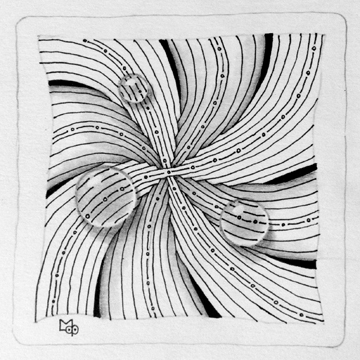
  • One side has tangle step-outs and tips and the other side is a monotangle drawing that uses tanglenhancers and tangleations.
  • Each card shows the elemental strokes needed to create the tangle.
  • Individual cards let you select several tangles and display them right in front of you. No flipping back and forth between pages.
  • The accompanying book, Tangle Deck Techniques, provides suggestions for exploring tangles using tanglenhancers and tangleations.

TD1-Book

Here’s what CZTs are saying…

“I love the deck!  Your hard work and effort really shines through with this product!  The deck itself is beautiful with clear instructions, wonderful size to see, and the pictures on the back with all the tangelation possibilities are incredible.  Your art work is really beautiful too. I also love the techniques book that you included….wonderful details!  I think you hit it out of the park with this one.”

Susan Clark, CZT

 “I just wanted to tell you that I bought the last deck of your cards at CanTangle. I was sure I didn’t want another deck of Tangle cards, but seeing it was the last one I thought why not. Well I need to tell you that last night I spent about two hours looking over them. Honestly I think it is one of the BEST purchases that I have ever made in the Zentangle line. They are fantastic, wonderful, inspiring and absolutely beautiful. I so wish you had taught a whole class at CanTangle. You are one very, very talented person. I could hardly wait to tell you how pleased I was and that I nearly missed out. Can you tell how happy I am with my deck? Thank you, thank you for a job well done.”

Nancy Smith, CZT

“The Tangle Deck arrived today. What a WONDERFUL job you have done. Love, love it. The booklet is excellent. You both explain and illustrate in clear, concise terms and renditions. I LOVE your artwork on the cards – and how you represented tangleations instead of just putting the tangle on there. The Enhancers section is terrific – especially that dew drop!   You give credit to R&M and have represented Zentangle perfectly. I just love the side bar with the strokes you use. So helpful – and a different touch from other publications, etc. The quality of the coated card is exceptional – I’m glad you did the book using that, as well. Very professional. Kudos and congratulations! Bravo, bravo!!!!”

Jenny Perruzzi, CZT

If you are interested in purchasing Tangle Deck, Click Here

Questions? contact sales@atanglersmind.com

Tangle Deck was developed by Meadowmead Studios LLC and is not an official Zentangle product.

Fassettoo – a tangleation of Fassett? or a new tangle?

In April I was fortunate enough to attend Tangle U in Santa Fe, New Mexico. (Tangle U is a continuing education conference for Certified Zentangle Teachers.) While we were there we had time to check out the local museums and shops and saw all kinds of wonderful patterns from the southwest. On one of these outings I saw a pot on the cover of a magazine and it was covered in what I thought was Fassett.

photo of clay pot from the southwest US
Fassett variation on a pot.

As I looked closer though, I realized that it was constructed in a different manner from the step-outs I came up with for Fassett. While this method results in the same look and feel of pointed flower/star shapes found in Fassett, I would categorize it as a woven tangle using the drawing method similar to that used in tangles such as Hurry and Auraknot. I’ve decided to give it a name all its own while still giving a nod to Fassett, so I’m calling it Fassettoo. Following are the step outs for both so you can see the difference.

Both Fassettoo and Fassett start with a triangle.

Fassettoo and Fassett both start with a triangle.

From that point on the step outs are different.
Fassettoo is on the left and Fassett is on the right.

Fassett-too-step-02Fassett-too-step-03Fassett-too-step-04Fassett-too-step-05Fassett-too-step-06Fassett-too-step-07

Put a bunch of them together and here is the
final result showing similarities and differences.

Fassett-too-tiles-compare

As you can see, the woven edge of Fassettoo provides a softer more subtle image while the lines in Fassett provide a harder more distinct edge. It’s a good reminder that simple changes to tangles can have a big impact on the look of a drawing.

I haven’t really answered the question about whether Fassettoo is a tangleation or a new tangle, I’ll leave that up to you because I really don’t think it matters much, but I do hope you have fun with Fassettoo.


Zentwining

The drawing on the Tangle Deck card for Onomato is an example of Zentwining.
This drawing of the Tangle Deck card for Onomato is an example of Zentwining.

I discovered the technique of Zentwining as I was working on the drawings for the fronts of the Tangle Deck cards. I needed a drawing for the tangle Onomato.  I picked up a piece of paper that I had drawn some random overlapping curved pencil lines on and began to draw ribbons wrapping around the lines. I then filled each ribbon with a variation of Onomato. I really liked the result and thought “this could be a technique that could be repeated easily.” I decided to share it and call the technique Zentwining.

1. The first step is to draw some overlapping curving pencil lines as in the following examples.

zentwined strings

2. Next start drawing in ribbons that wrap around these lines. The ribbons are drawn in a similar way to the technique used in the tangle Aquafleur. I’ve used both re-curve and c-curve versions as shown below.

recurve c-ribbon

Here is an example.

add ribbon

3. Ribbons can go in any direction, extend off the page, and even cross lines. Using the Hollibaugh method of drawing behind makes it even more interesting.

All ribbons

4. Once you are satisfied with the quantity and placing of your ribbons, the next step is to draw over the pencil lines with pen making sure you stop at the edge of each ribbon and then start up again on the other side. Here is an enlargement so you can see what I mean.

detail

Here is the drawing with all the lines drawn in pen except where the ribbons cross.

lines

5. Now start adding tangles to the ribbons. You can use variations of one tangle as I did for the Onomato card or use different tangles.

add tangles

As you can see, any remaining pencil lines are beginning to disappear into the tangles.

all tangles

6. The final step is to add shading. I add shading to the tangles themselves first, then I add just a touch of shading to each side of the string lines to add a little 3D effect (makes the shapes formed by the strings kind of puffy.) Lastly I add shading to the ribbon shapes if I think it needs it.

Here are a couple of finished examples.

Done

I will admit that this technique can take some concentration as it can get kind of busy as you work on it. Just take it slowly and be aware of your strokes and you’ll do fine. Hope you have fun playing with this technique and I look forward to seeing what you come up with.

Lynn Mead, CZT

Zendau – seed of life tangle

I recently returned form Tangle U, a continuing education conference for Certified Zentangle Teachers held in Santa Fe, New Mexico. It was a very rich pattern environment in which to learn new tangling techniques. Here are just a couple of the wonderful patterns that are everywhere in Santa Fe.

TUBasket01-low-res TUBasket02-low-rew TU-Pot-low-res

These images reminded me of a tangle I developed a while back based on a Native American basket. The inspiration for the tangle came from a photo of a blanket in a Pendleton Catalog.

Pomo Dau Blanket-low-res

The striking pattern at the center of this blanket caught my eye immediately. Then I read the description that was the inspiration for this blanket.

“Pomo Dau
To the Pomo, a basket can be a tool, an honor, a gift or an art. It comes to you in a dream and stays with you in death, a thing with a spirit and a story all its own. In every basket the weaver leaves a small break in the pattern, anything from a single stitch to a new design. This is the Dau, the ‘door’ a basket’s spirit passes through to inspect completed baskets and fill them with energy.”

I was hooked. It seemed like the perfect pattern to turn into a tangle as a tangled drawing is indeed “a thing with a spirit and a story all its own” and for me tangling is the door to the calm, focused and creative state of mind I achieve while using the Zentangle method. Thus I have named this tangle Zendau, meaning doorway to zen. Zendau is really a variation of what is known as the seed of life, I’ve just broken it down into repeatable steps to create a tangle.

Although it seems like there are a lot of steps to this tangle, there are really only 4 basic steps which are repeated with each successive ring and it is constructed of just a simple curve line in each step. I enjoy how the basic petal form grows with each progressive ring and encompasses the petal forms of the previous rings creating a design that has a fractal quality. It’s organic and geometric at the same time and reminds me of artichokes, the bottom of pine cones and flowers.

How to draw Zendau

First select what I call the “seed” shape. This will determine how many “petals” your tangle will have on each ring. Below are three seed shape examples for 5, 6 or 8 petals.3SeedTypes-low-resThe following step out drawings use the 6 petal seed shape.

  1. To start, draw the seed shape
    Zendau step - 1LR - Lynn Mead
  2. Fill in the petals, then round the angles in the center so that it forms a circle. Note: you can adjust the shape as you fill it in. This will help to keep the figure fairly even as you draw each ring.
    Zendau step - 2LR - Lynn Mead
  3. Draw a curved line from petal point to petal point to form a circle around the petals. Rotate the tile as you draw the curves so that your hand remains in approximately the same position for each curve. This will help keep your curves more consistent.
    Zendau step - 3LR - Lynn MeadZendau step - 4LR - Lynn Mead
  4. Put a dot midway between each petal and a distance out from the circle. The distance from the circle will determine the size of the petals on this ring. It helps to sight an imaginary line across the figure when positioning the dots.
    Zendau step - 5LR - Lynn Mead
  5. Draw a curved line from the tip of each petal point up to the dots in between. This forms the new petals for this ring.
    Zendau step - 6LR - Lynn Mead
  6. Fill in the petals.
    Zendau step - 7LR - Lynn Mead

Repeat steps 3 through 6 for each ring as you draw from the center out.

Zendau step - 8LR - Lynn MeadZendau step - 10LR - Lynn MeadZendau step - 11LR - Lynn Mead

I frequently add a different pattern to the final ring to honor the original inspiration and create a door for the tangle’s spirit to enter.

Zendau step - 12LR - Lynn Mead

Tips for drawing Zendau.

  1. Don’t worry about getting things perfect, it will look beautiful when completed. Also, know that you can make minor adjustments to size and shape as you fill in the petals.
  2. You can fill in the petals with solid color and use it like a medallion or use it as a string and fill the petals with other patterns.

Following are some examples of Zendau:

Zendau tile 4 - Lynn MeadZendau tile 3 - Lynn MeadZendau tile 2 - Lynn MeadZendau tile 1 - Lynn Mead

In the following Zendala, Zendau is used as the string and filled with other tangles.

Zendala-01LR

Fassett and her sister Phroze – Tangle Step-outs

About a year ago I had my first tangle accepted and posted to TanglePatterns.com. You may have seen it there, it is called Fassett. Recently while starting to draw Fassett it morphed into a related but NEW tangle. I decided to call this new tangle Phroz because it looks a little like ice crystals and was born in winter. Here they are together.

Zentangle tile featuring Fassett and Phroz tangles

I thought I’d take the opportunity to post the stepouts here and discuss the similarities and differences of these two tangles.

Step 1. Fassett and Phroze are both based on triangles and start out the same way. Note that the points of all the triangles only touch the points of other triangles. Here, for Phroz, the center of each triangle is marked with a red dot.

Step-1-Fassett Phroz

Step 2. This is where the two tangles diverge. For Fassett you draw inner auras in each of the triangles, while in Phroze you divide each triangle into 3 more triangles by drawing a line from the center dot to each of the corners.

Step-2-FassettPhroz

Step 3. In this step for Fassett you draw a line through the corners of the inner auras to connect to the corners of the original triangles while for Phroz you draw an inner aura for each triangle.

Step-3-FassettPhroz

Step 4. Fassett is now complete while Phroz has an additional step which is to draw a line connecting the corners of the triangles with the auras.

Step-4-FassettPhrozStep 5. Phroz is now complete.

Step-5-FassettPhrozAs you can see the steps are very similar but because Phroz has an additional step it looks quite different from Fassett.

Both Fassett and Phroz can be drawn on either an irregular layout or a grid layout as is illustrated in the following graphic.

triangle layouttriangle layout-Fassetttriangle layout-PhrozThis is a tile I did for Adele Bruno’s “It’s a String Thing” challenge #81 at tickledtotangle .
Tangle Patterns String 082 using Phroz in the center transitioning into Fassett on the outside.

Phroz-2

Hope you give Fassett and Phroz a try. Let me know what you think.

Dew Drop Tutorial


I recently posted this tile with the Dew Drop tangle enhancer (AKA tanglenhancer) on one of the many Facebook pages featuring Zentangle tiles and artwork. There was such a positive reaction to these dew drops that I’ve decided to post a tutorial on how to do them.

First of all let me explain what a tanglenhancer is. It is a technique which can be added or combined with a tangle to change or enhance it’s appearance. In the case of Dew Drops it gives the appearance of water drops on the surface of the tangle.

Here are the steps to reproduce Dew Drops.

Dew Drop 01a

Using pencil, define where the dew drops will be when drawing your string.

Dew Drop 02a

Using pen, draw your tangles as usual except stop and start the lines at the edges of the dew drops.

Shade all sections except the dew drops.

TIP: Tangles that are mainly constructed of lines are easier to create as Dew Drops. Remember this when choosing tangles for this purpose.

Dew Drop 03a

Using your pencil, shade the dew drops as described below:

  1. Dew Drop shading diagramLeave an area white for the highlight.
  2. Add a dark thin line to define the upper edge. Note: DO NOT outline the dew drop in pen.
  3. Lightly shade the middle of the dewdrop going almost to the the edge.
  4. Leave a lighter area along the edge opposite the highlight.
  5. Add a shadow to the outside of the dew drop opposite the highlight.

Variation: If you stop at this point the shapes will appear like pearls sitting on top of the tile.

Dew Drop 04a

The final step is to add the lines indicating the tangles underneath. Make sure NOT to draw over the white upper highlight.

TIP: You do not have to duplicate the exact number of lines from the tangle underneath. Start with the line(s) that would cross the middle of the dew drop. As you add lines just increase the space between them to be slightly more than the pattern underneath giving the illusion of magnification. Stop the lines just short of the dew drops edge.

With a little practice you too can enhance your tangles with Dew Drops.