Threezee – New tangle developed by the CZT crowd

Something interesting happened to me recently. I was busy drawing when an image suddenly popped into my head. It had nothing to do with what I was drawing but it demanded to be put down on paper. This is what it was…

It is a simple motif that is made up of three Zs. This little guy gave me such happy feelings that I did a quick step-out and called it ThreeZee. I didn’t have time to play with ThreeZee right then so I posted it to a CZT page to ask if anyone had seen anything like it or had used the name before.

It was then that a wonderful thing happened. ThreeZee inspired several CZTs to do some explorations and use ThreeZee in some very interesting ways.

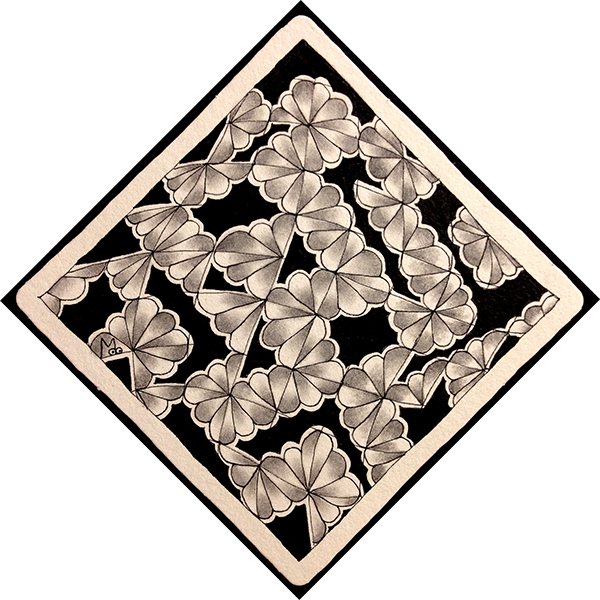
First, Marguerite Samama used it as a string on a 3Z tile (how appropriate!)

Tile by Marguerite Samama, CZT

Of course, I had to give that a try too!

I used some of the introductory tangles in honor of the “Z string”.

That made me want to see what kind of meta pattern would be created if I drew it as a fragment in a hexagonal grid. The result was very quilt-like and I had fun adding the tangle Maryhill (by Betsy Wilson, CZT) which gave it real dimension.

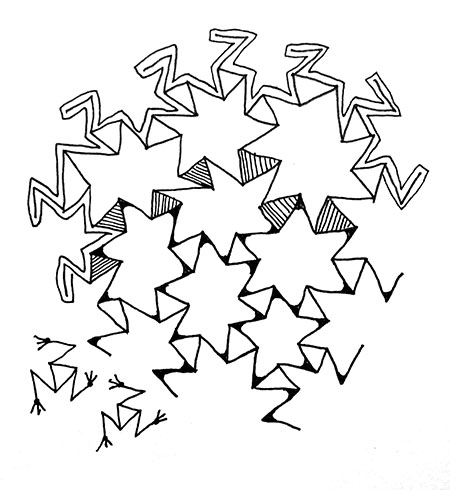
Then Jane MacKugler posted a wonderful, colorful, freeform version of ThreeZee. Adding to the basic motif resulted in a meta pattern of stars.

Tile by Jane MacKugler, CZT

Then Diana Schreur, CZT posted another version of this freeform style. She used ThreeZee with her tangle, Connesses, which, similar to ThreeZee, is made up of three Ss. (Step Outs for Conesses can be found on TanglePatterns.com )

Tile by Diana Schruer, CZT

Of course these two tiles inspired me to give this free form style a try too. Also, this question arose, “What do you call a group of ThreeZee? a Cozy of course ; )”

TIP: I did find that it is easier for me to keep track of things when grouping ThreeZee, if I draw the second Z of the motif all the way around to form the star first, and then go back and add the third Z (see illustration below). Also, be mindful that you are drawing a Z and NOT a mirror image.

Use the same method when adding additional ThreeZee to create a grouping.

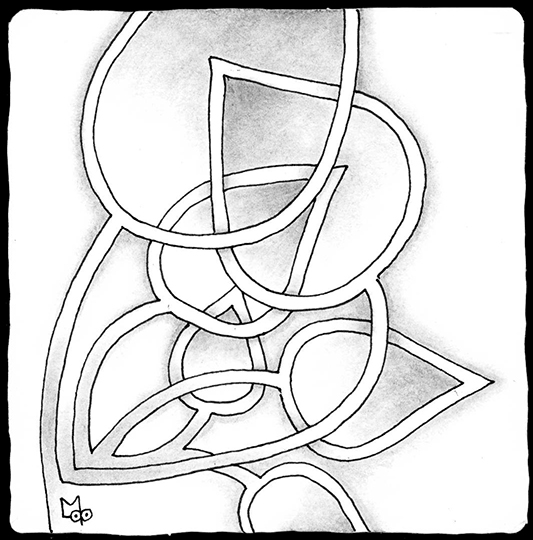
OR use another form at the intersections of ThreeZee, such as the orbs in this example, and create an even more random grouping.

I call this one “The Soccer/Football Game”

I also played with putting ThreeZee in a circle Reticulum using a curvy Z and some auras. Here is a work in progress drawing so you can see the progression.

Or ThreeZee as a border.

A chorus line of ThreeZee RockettZ

And finally, connecting the “legs” of a ThreeZee motif for an Origami Threezee.

Origami ThreeZee

I just love the way this tangle introduced itself to me and created an environment that inspired others to help develop its potential. Kind of Crowd Sourcing for tangle development or as Rohini Singh, CZT put it recently, I may be ThreeZee’s Mother but Marguerite, Jane, and Diana are the midwives that helped give it birth.

I hope you give ThreeZee a try. As you can see it’s very versatile and I think you will find it will make you happy too. What can be better than that?

Blessings,
Lynn

Rainking – Square One Focus

The square one focus for the week of Nov 11-17 is Rainking by Leona Shih. Stepouts can be found here.

Rainking can be considered a fragment tangle. Fragment tangles are the elements that fill the spaces of a grid. Fragments can be rotated or mirrored to create variations. Rainking reminded me of another tangle, Cornerz by Didier Gervy, that can be rotated and mirrored to create either a very ordered pattern or a more organic meandering pattern. Here’s an example of Cornerz. I drew the same fragment on 16 Biju tiles then laid them out in different ways, all the same orientation in one example and rotated randomly in the other example.

cornerz02

cornerz

For my Rainking tile I decided to create a more random meandering version.

First I drew a grid with wavy lines to show some movement, and started adding the Rainking fragment randomly.

rainking01-150ppi

Here it is with the Rainking covering the tile.

rainking02-150ppi

I then drew an aura around the spaces that formed between the Rainking fragments and began filling them in with black. I wanted to cover up some of the grid lines and make the fragments stand out more.

rainking03-150ppi

After I got the spaces between filled with black I wondered what it would look like if I shaded each “petal” of Rainking in the opposite direction of the one next to it. I started by adding graphite alternately to the top or bottom of each “petal”. ( I remembered to take photos of the shading in progress for this tile.)

rainking04-150ppi

Here is the tile before the final blending.

rainking05-150ppi

And here is the finished tile. After blending I went back in and added more shading to the darkest areas.

rainking07-150ppi

The final result reminds me of fallen petals after a spring bloom. This was an interesting experiment.

As always if you see something in this post that you’d like to try in your own work please feel free to do so.

Blessings,

Lynn

Pepper – Square One Focus

This week kind of got away from me so I thought I’d better hurry up and write a post before the next Square One Focus Tangle was revealed.

This weeks focus was Pepper. Honestly, Pepper has never really inspired me much so as usual I started by playing around with it in my sketch book.

Sketches150ppi

I had fun with extending the Pepper stripes into Quib and then back to Pepper again. Also liked the floating Pepper and the flower-like figure that emerged when I added some rounding.

What I ended up with when I started my tile was a combination of some of the features that presented themselves as I sketched.

Pepper-01-150ppi

The string was simple.

Pepper-02-150ppi

I added Pepper with tails fluttering behind and a variation of Rain bent around it.

Pepper-03-150ppi

I filled in the Pepper stripes and tails with a few sparkles added for interest and added some line weighting to the Rain lines for dramatic effect.

Pepper-04-150ppi

I added minimal shading to emphasize the Pepper shape and add a little more interest to the Rain. This is the final tile.

After I had posted this tile I found myself awake in the middle of the night, which doesn’t happen very often to me. I used this time to do another Pepper tile. I didn’t take W.I.P. photos but following is the finished tile. If you’d like to try these Dew Drops check out my tutorial.

Tile 2-150ppi

As always, if you see anything in this weeks post that inspires you, please feel free to play around with it in your own work.

Blessings,

Lynn

Pokeleaf – Square One focus

This week’s Square one focus is Pokeleaf. I haven’t used this tangle much recently, so I enjoyed playing with it a little in my sketchbook.

sketchbook01

First I played around with different ways to embellish the leaves.

Sketchbook-03-150ppisketchbook02

Then I thought “What if I drew Pokeleaf in a Mooka way?”. I liked the idea but the leaf shapes kind of got lost. I decided to add an inner aura to the leaves and make them “see-through” so I could see the leaf shape behind. I really liked this look and decided to use this on my Square One tile.

Pokeleaf 01-150dpi

I started with the Mooka’d Pokeleaf with the inner aura on each leaf so the leaves behind could be seen.

Pokeleaf 02-150ppi

I then added a little shading to the “stems” and where the leaves overlap.

Pokeleaf 03-150ppi

It seemed like the leaves needed some definition so I added shading that was darker at the tips and gradually gets lighter toward the stems. This is a bit of play with Positive and Negative shapes as I often like to do.

Pokeleaf 04-150ppi

Finally I added a little shading around the outside of the leaves just because it seemed like it needed it to pull it all together.

I like that it turned out simple yet complex looking at the same time.

UPDATE: Mooka’d see-through Pokeleaf #2

I did another tile using the Mooka’d see-through Pokeleaf as a string. Following are the work-in-progress photos.

image

Without shading the filled in string looks kind of flat and busy to me.

image

Adding shading creates emphasis and dimension. The shading is simply added around the edges and where forms overlap.

image

As with all the work I post, if you see something you like please feel free to experiment with it in your own work.

Blessings,

Lynn